My Files — the directory explorer
Every clip, render, and asset you touch in VidFarm lives in one unified file tree with five roots. Here's how to browse it, organize it, and attach files straight into a chat or an edit.
Key takeaways
- One unified file tree spans five roots:
/files·/temp·/raws·/projects·/approved. /rawsis durable footage;/tempauto-deletes after 30 days;/projectsis your forks, read-only.- The same explorer appears in three places: the
/library/filespage, the chat dock's Your files drawer, and the pop-out picker. - Right-click or use the kebab for Rename / Move / Copy / New subfolder — available on free and paid.
- Move and Copy are same-root only and metadata-only — copies share the underlying object, so no re-upload.
One tree, five roots
Everything you create in VidFarm — imported footage, mined clips, rendered videos, brand assets, character sprite cards — lands somewhere in a single file tree. Instead of hunting through five different UIs, you browse one explorer whose top level is five named roots, each with its own job and lifecycle.
/files— your durable personal files (My Files attachments), organized in free-form folders. Persistent, and vector-searchable via their notes./temp— scratch space in auto-datedYYYY-MM-DDfolders. Auto-deleted after 30 days./raws— your reusable clip and source-footage library, grouped by source. Persistent./projects— your composition forks, one folder per fork, browsable but read-only./approved— published, ready-to-post cuts. Each is a single publishable unit.
/files/characters/<slug>/ is the first-class home for a recurring character — a trio of character_<slug>.json (the manifest), character_sprite_card.png, and character_about.md. It's how a face and outfit stay consistent across generated shots.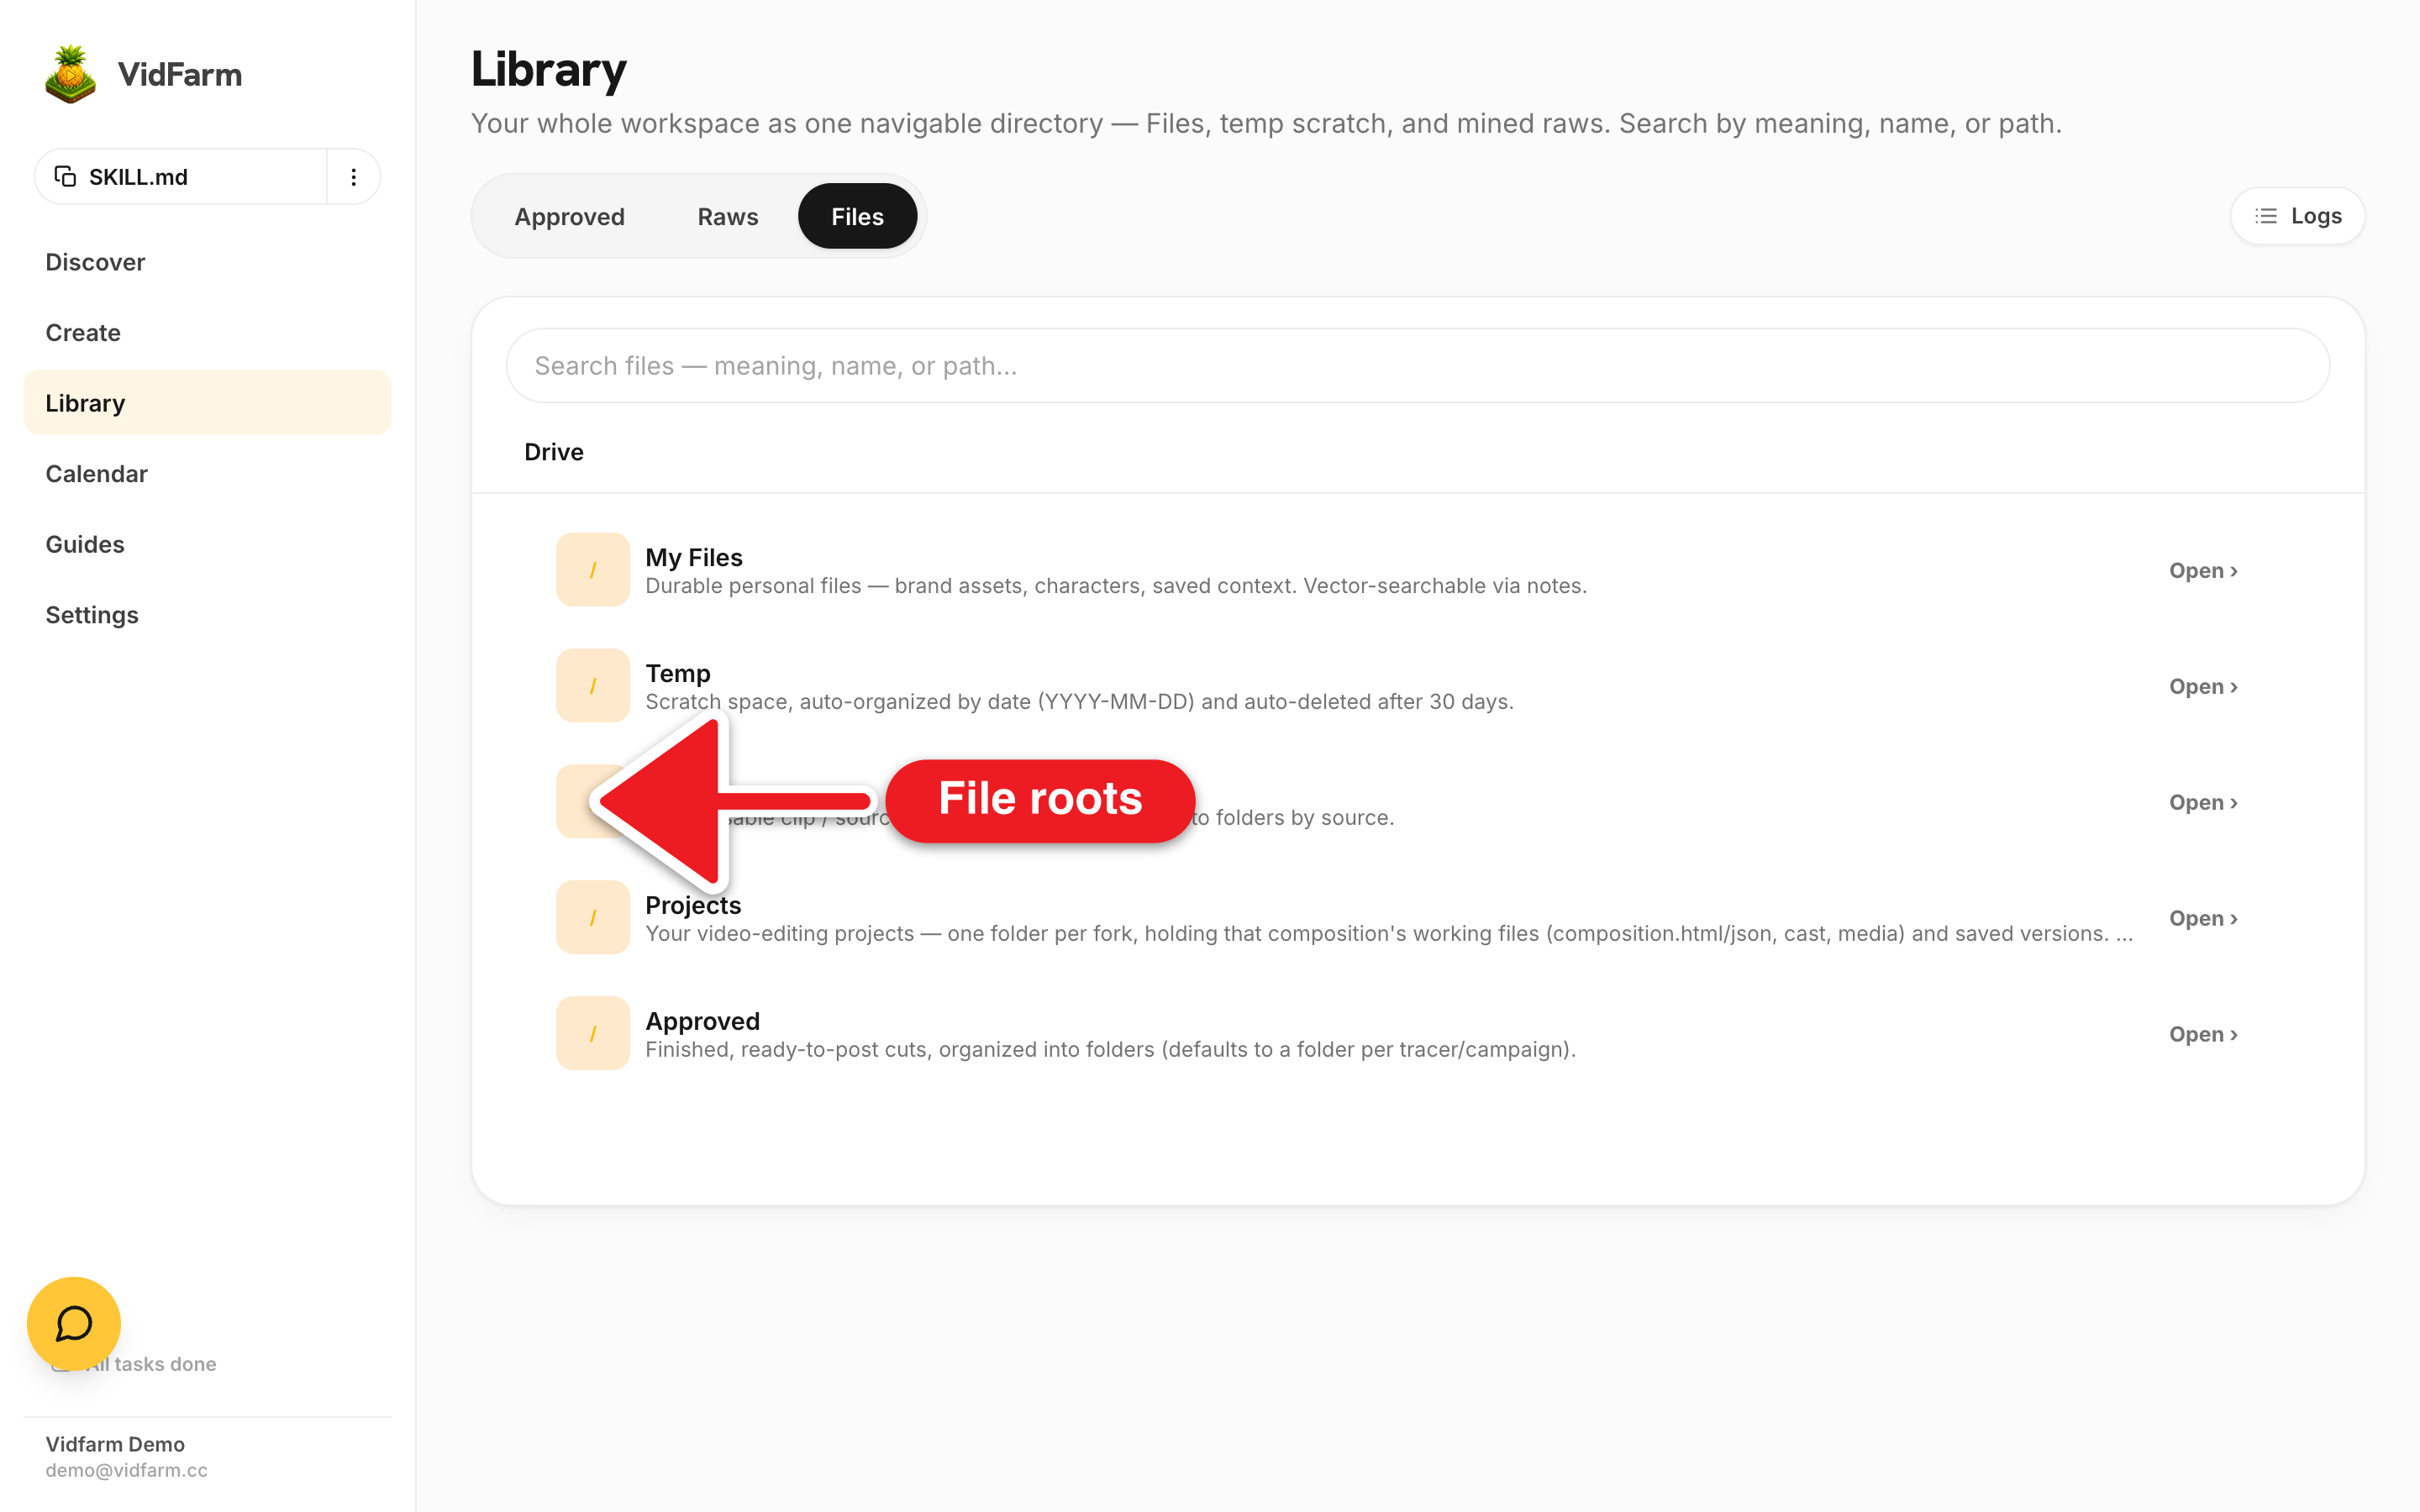
Manual walkthroughBrowse & organize (the /library/files page)
-
Open My Files
Head to /library/files . The list starts at root
/, showing the five roots. It's one of the four tabs of your library — alongside Approved, Raws, and Logs. -
Drill into a folder
Click a root to open it, then keep clicking to drill into folders. A
/rawslisting, for example, is grouped by source — each folder is a video you imported, full of the clips mined out of it. -
Search by meaning or name
Use the search box to find files by meaning (a vector search over each file's notes) or by name. This is why annotating matters — a good note makes a file findable months later when its filename tells you nothing.
-
Rename, move, copy, or make a folder
Right-click a file or folder — or open its ⋮ kebab menu — for Rename, Move, Copy, and New subfolder. Use New folder here to create one at the current level. These actions work on free and paid accounts alike.
-
Preview a file
Click a file to preview it. Its durable view URL is exactly the URL you can drop into a composition layer or an AI primitive — no re-hosting needed.
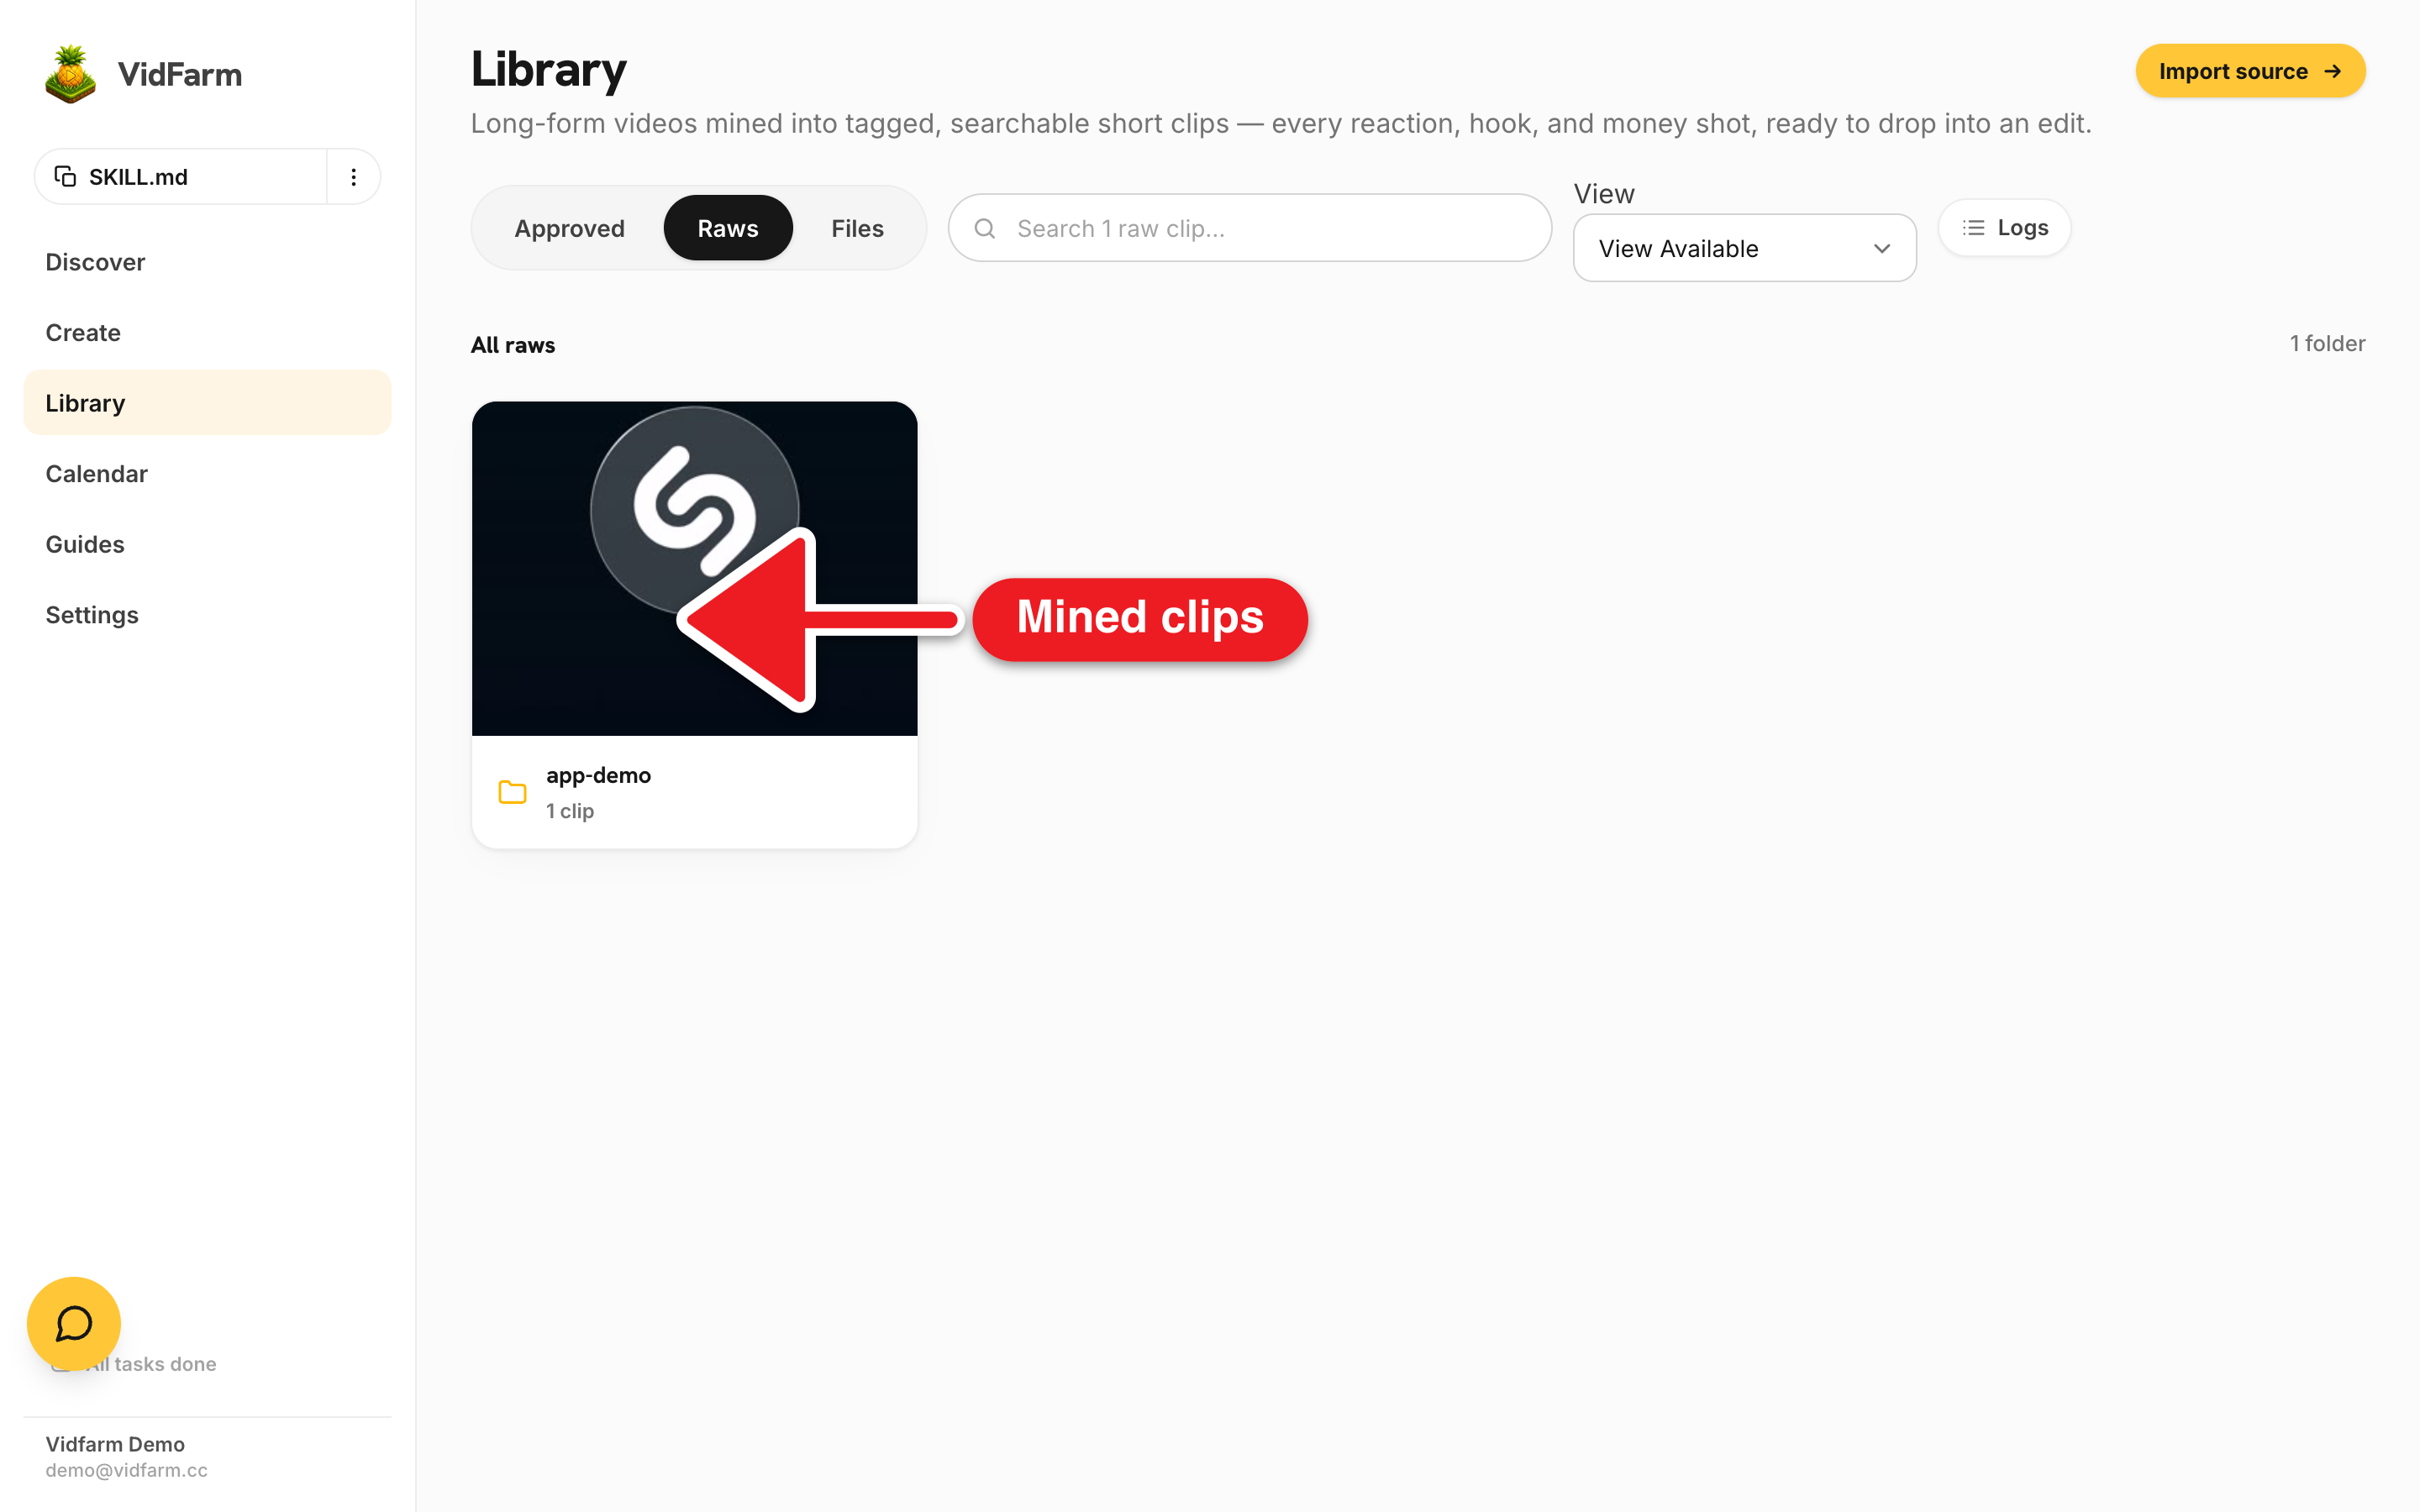
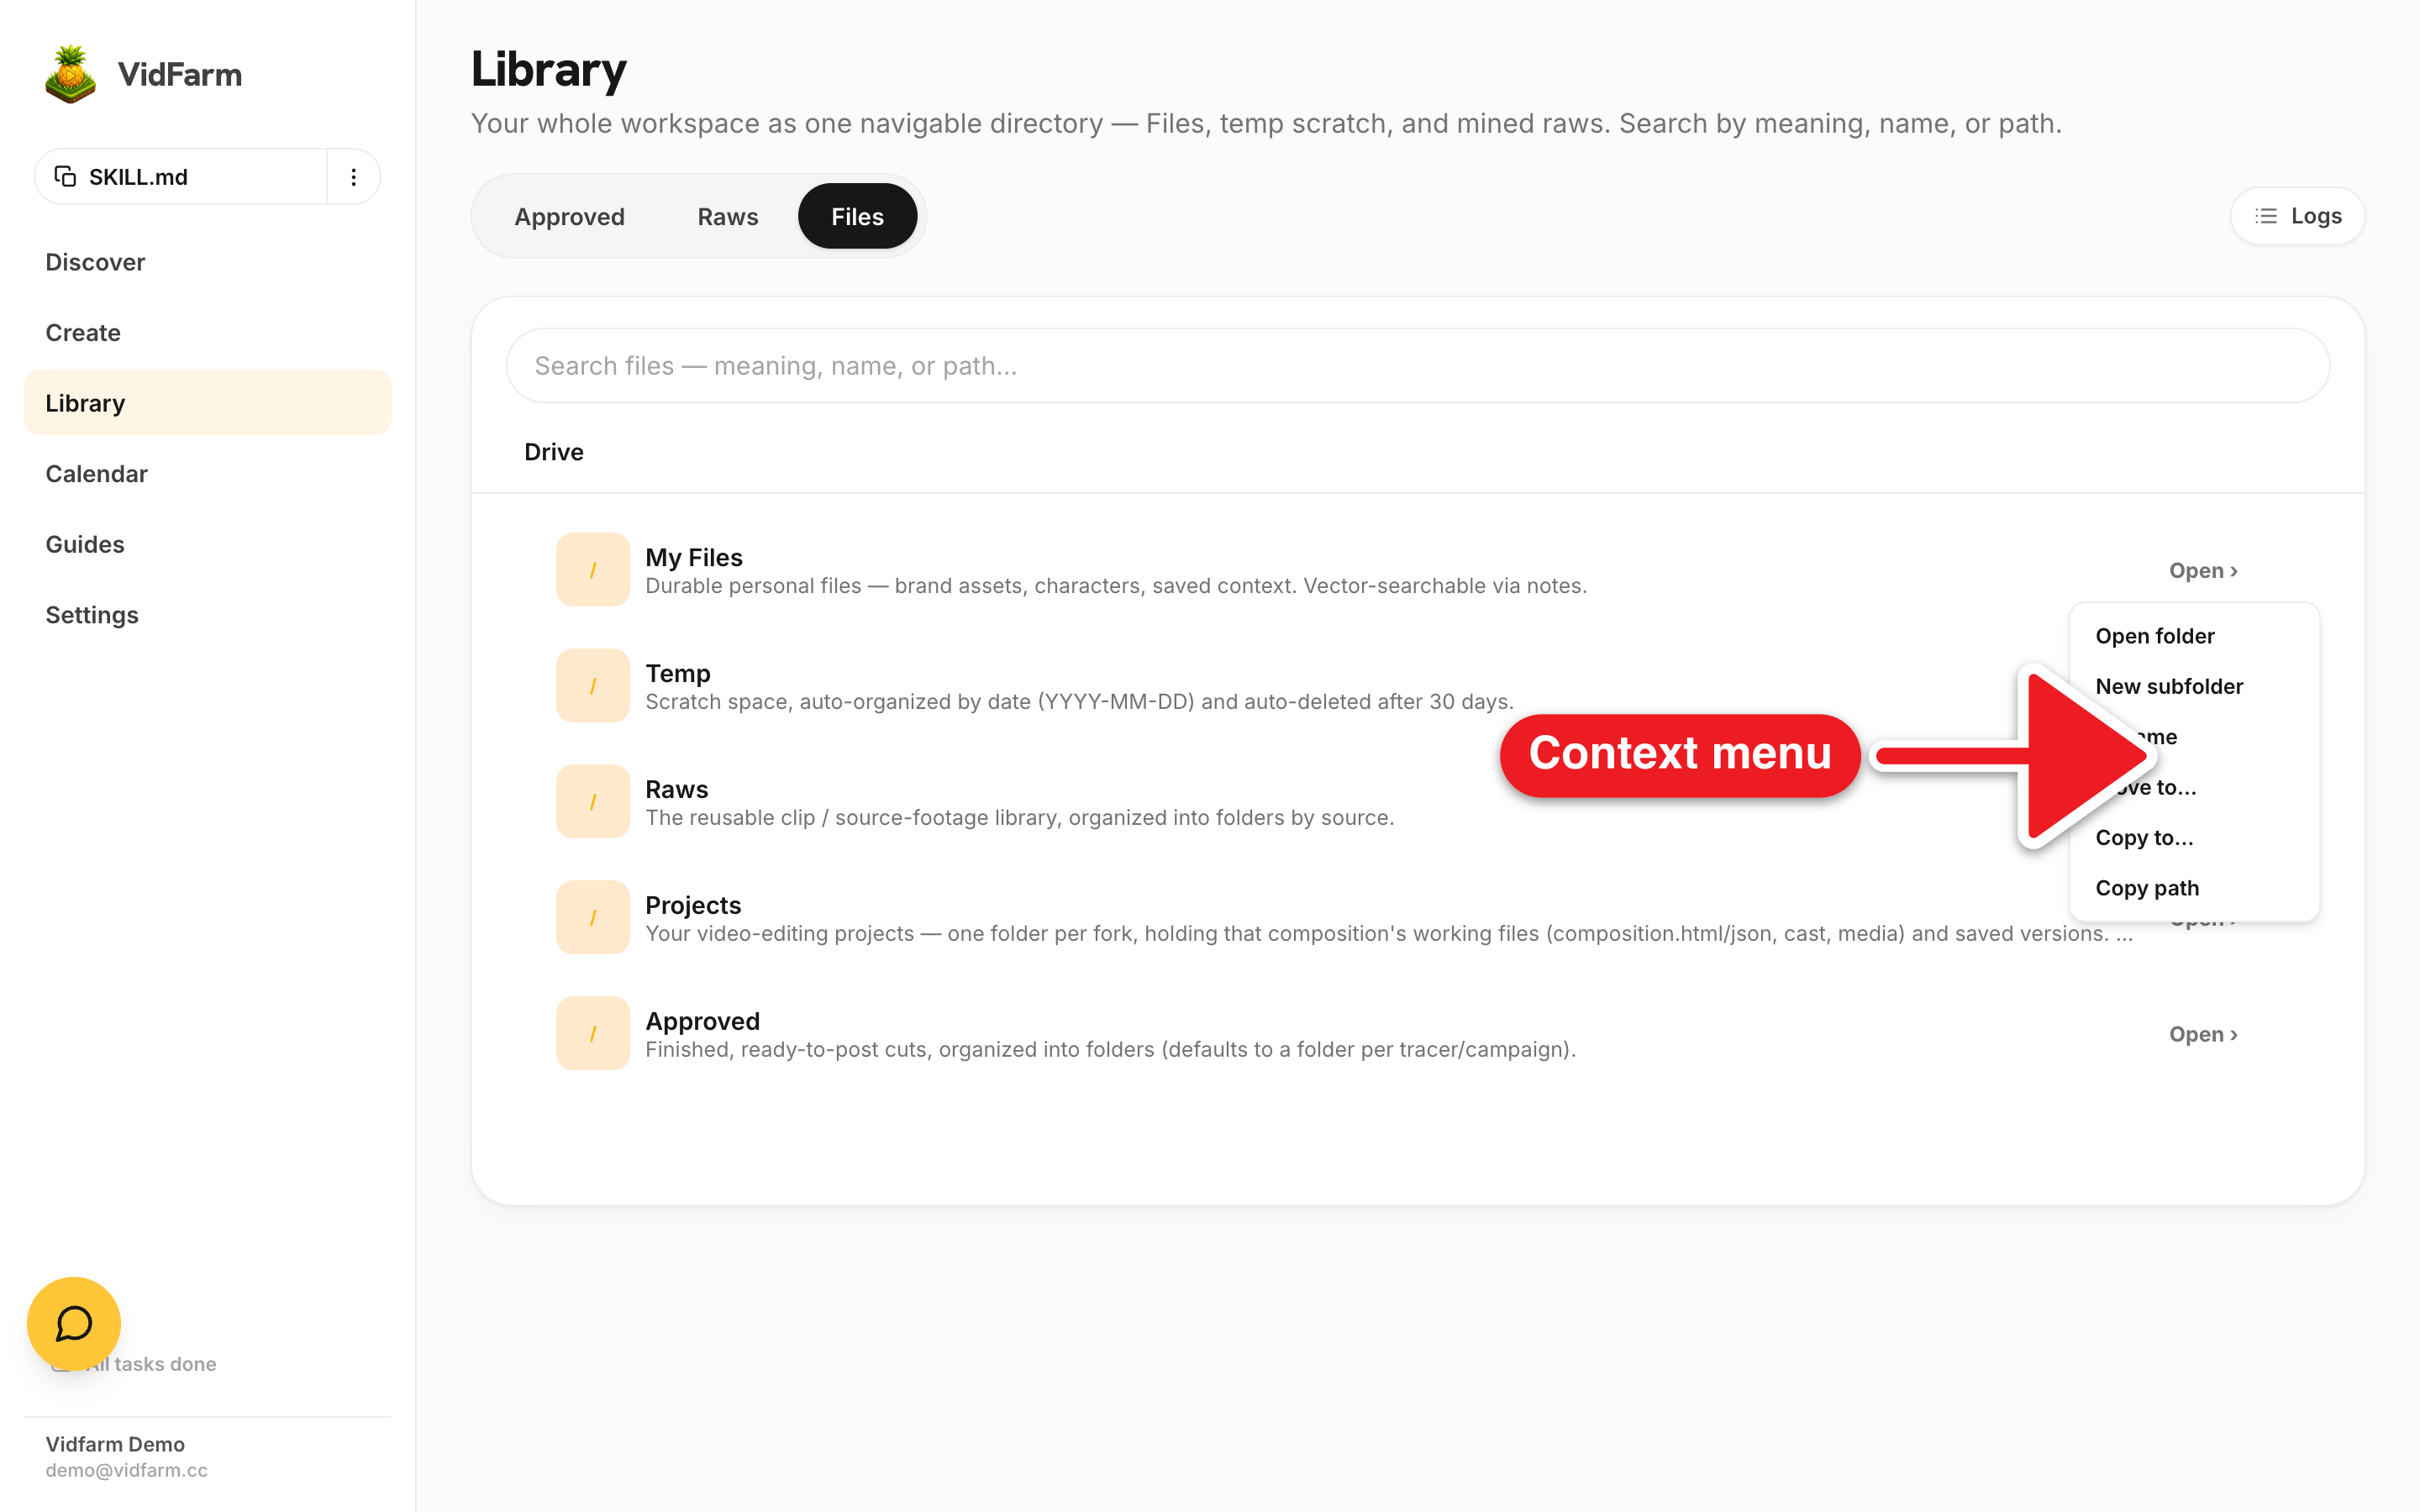
/approved or /projects — they're read-only / single-publishable-unit roots.Attach from anywhere (the chat dock drawer)
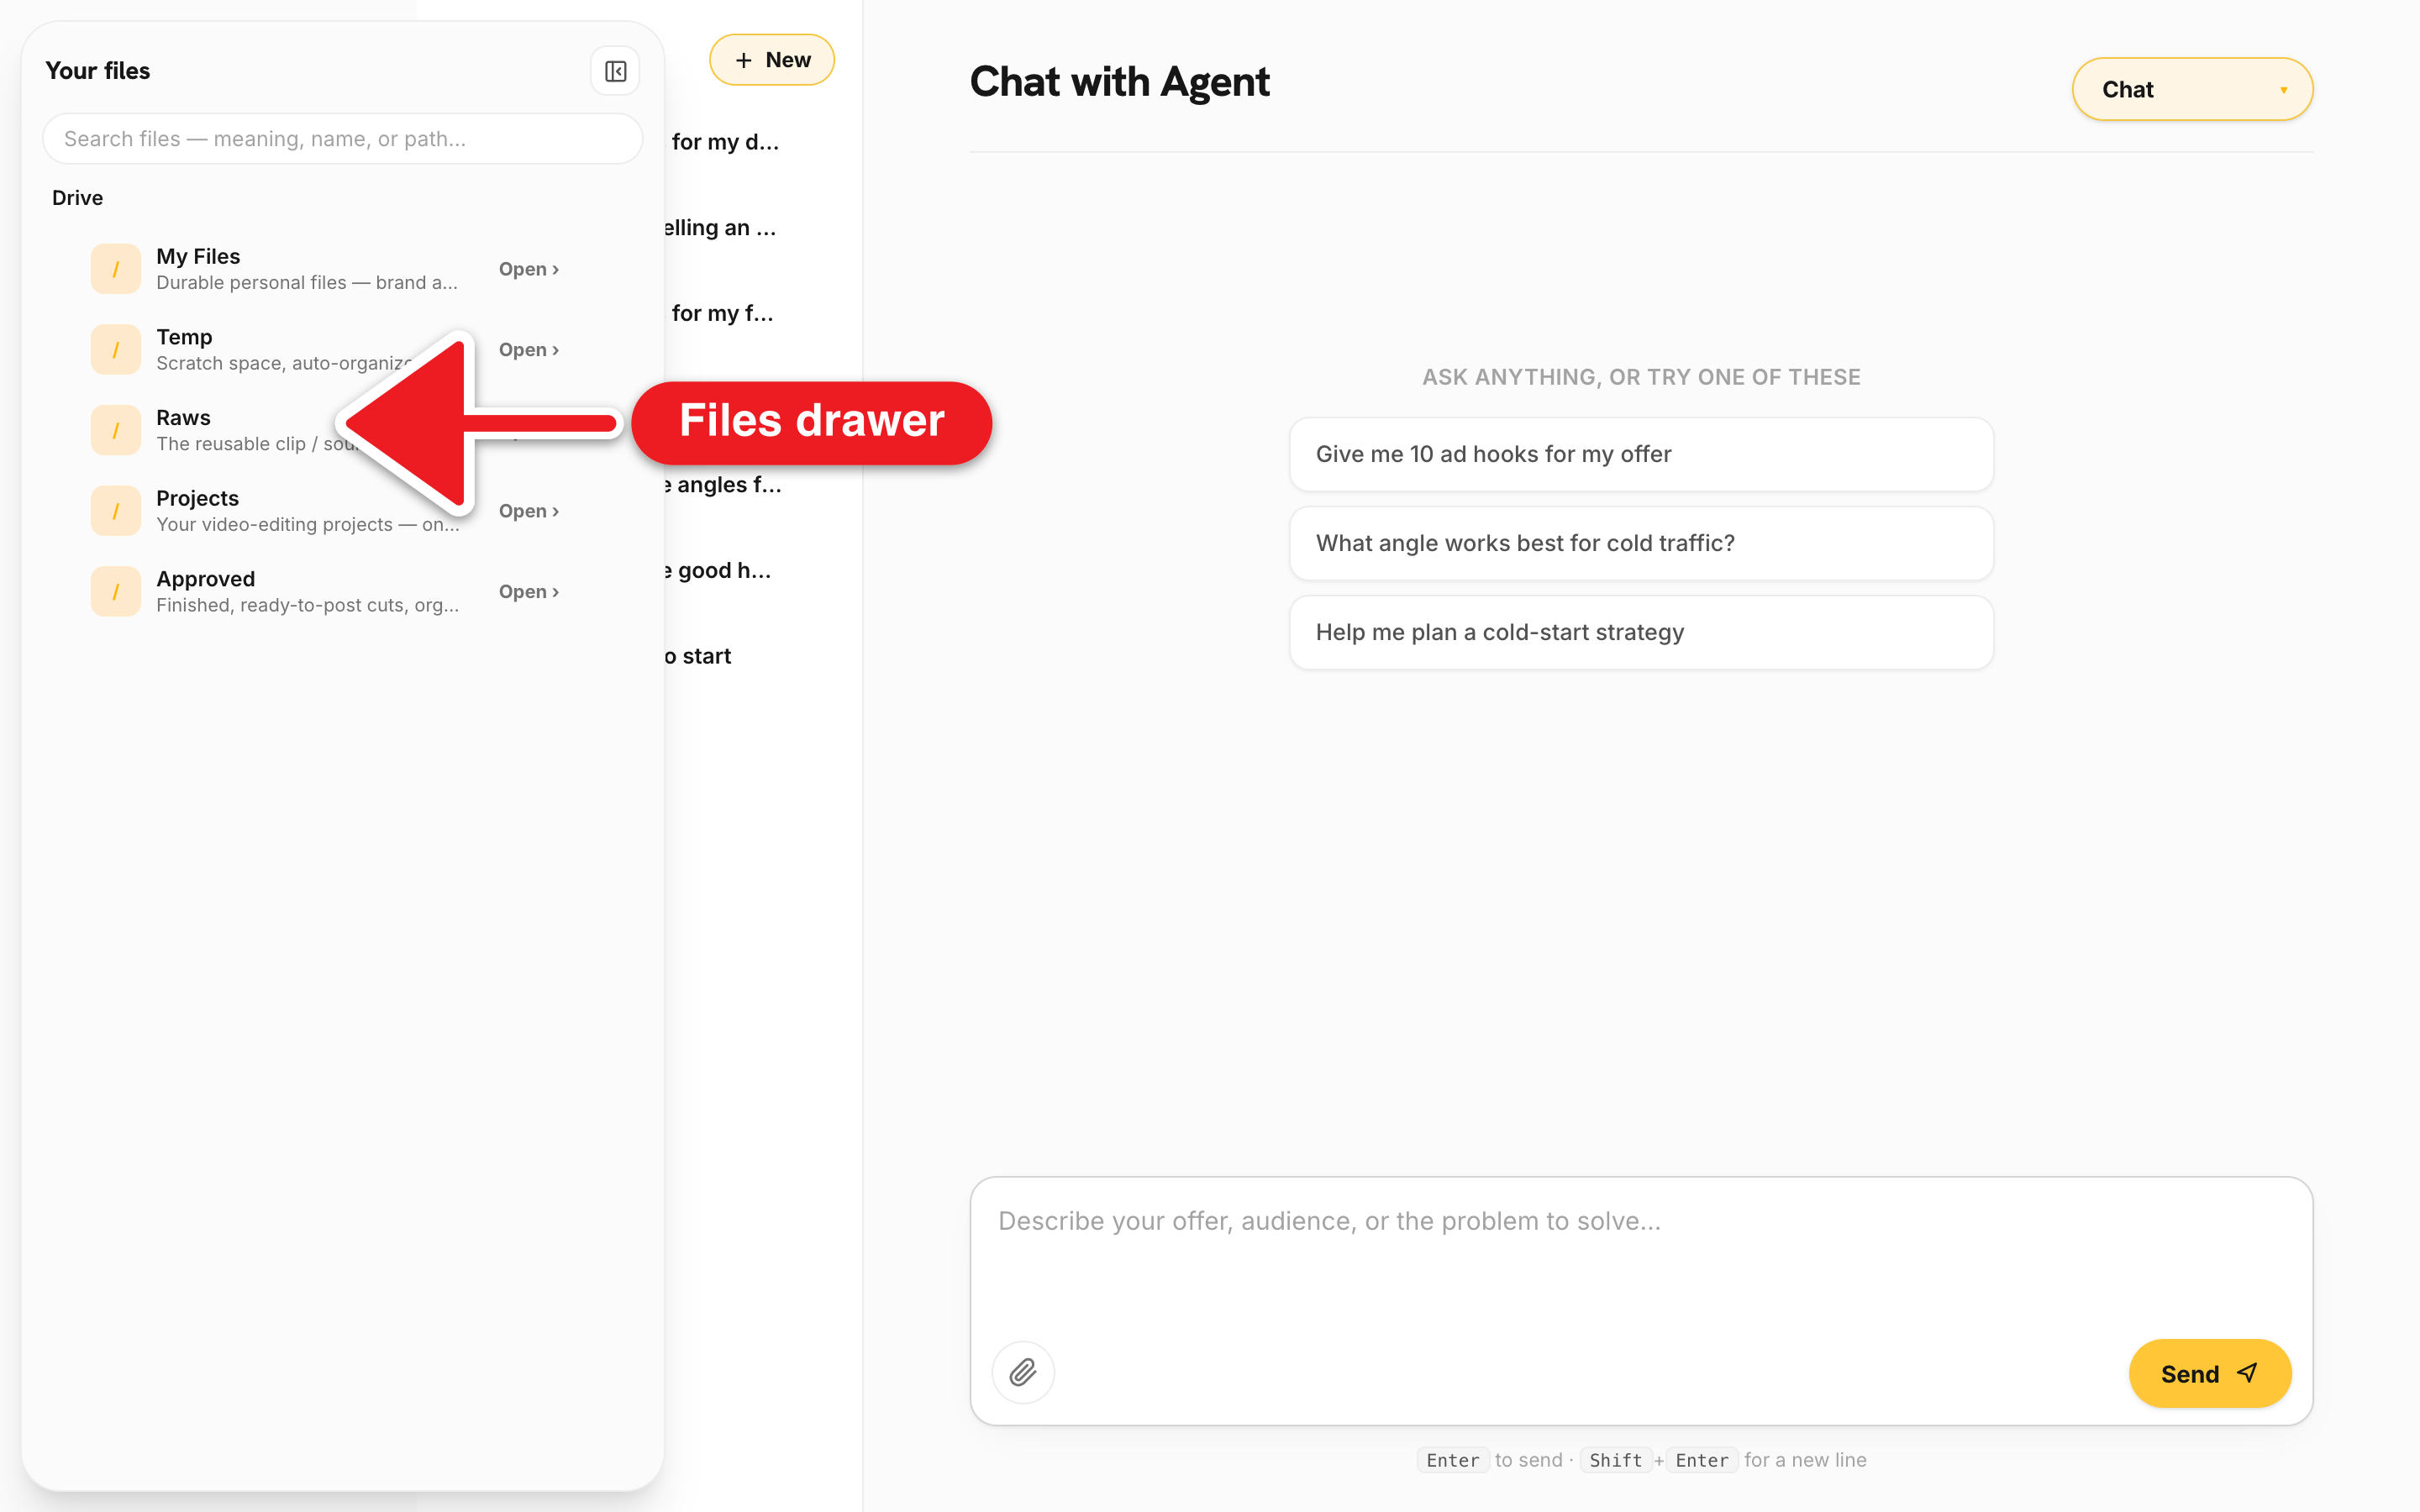
The exact same explorer is mounted inside the chat dock's left Your files drawer. That's how you hand a file to the AI: attach it to the current turn and the copilot receives the file plus its URL, ready to pass into a generation or drop onto the timeline.
-
Open the Your files drawer
In the chat dock, click the paperclip / Attach a file button (or the Files toggle) to slide open the Your files drawer — the same tree, in attach mode.
-
Navigate and attach
Move through the roots (
/files,/temp,/raws,/projects,/approved) and click a file to attach it. A chip appears in the composer to confirm it's along for the ride. -
Send — the AI now sees the file
Send your message. The copilot receives the file as a content part and its view URL, so it can use it as a reference image, a media layer, or a primitive input.
notes are vector-embedded on save, so a good description is what makes it turn up in a semantic search later. And assume My Files is multi-offer: read the folder tree first and scope your reads to the right brand folder, so you never mix one client's logo into another's video.Where to go next
Now that you know where footage lives, go fill the library and put it to work:
Open your file tree
Five roots, one explorer, and it shows up wherever you need to point at a file. Browse My Files, tidy a folder, and attach an asset into your next edit.
Open My Files